I was asked to make a neckline tutorial. This method of construction will give you a neckline that sits well on your shoulders rather than bunching up or pushing against your neck.
Once you’ve cut out the body of your tunic, fold it in half length ways and mark the shoulders. Fold in half width ways and mark the center front and back. Set that aside.
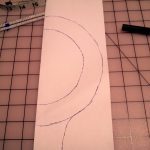
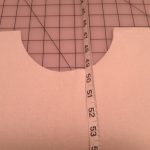
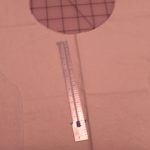
Using tracing paper, make your neckline pattern. If your neck is 15 inches around, you need a 5 inch neck hole. If it is 18 inches, you need a 6 inch neck hole. (neck measurement and divide by 3) When you have that measurement, mark it on a folded paper. Then make your half circle. From the half circle line, add at least 2 inches. 4 is preferable. (pics 1-3)
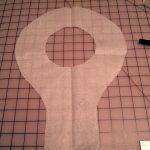
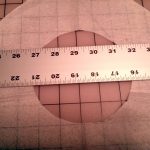
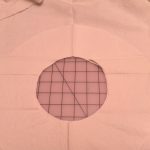
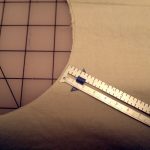
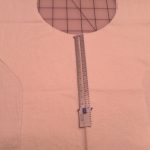
Then add a front piece to one side where the slit will be. Cut out pattern and then open it up. On a cutting board, line the pattern up and from the top edge of the inner circle, measure down 1 to 1.5 inches. Mark the pattern with a line clear across. (pics 3-6) The bigger the measurement, the deeper the back neck line will sit. If you have a thin neck, 1 inch will be fine. If you have a massive neck, you may need to mark it at 2 inches. Use tissue paper to make a mock up first so that you get it right. When you are satisfied with how the shoulder line sits, use that pattern.
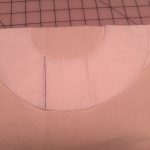
Take your fabric and lay it out so that the center front fold runs the length of the material. Match the shoulder mark on the pattern with the shoulder marks on the fabric. Pin and mark. Be aware that the pattern will look off center. (pics 7-8) Cut the fabric. Then using a scrap piece of fabric, pin and cut a facing. Make sure the fabric has the same shoulder markings. (pic 9)
Open up the fabric and facing. Match the center front and back markings and the shoulder markings. Pin fabric. Keep the fabric aligned. Then mark a .5 inch seam all the way around the neck opening. (pics 10-11)
When you get to the center front, mark the .5 seam at the top of the center line. Mark down at least 5-6 inches. This is your tunic opening. General way to figure it is head circumference – neck = center slit. (23-16=7) You can always test this on a scrap piece cut like the facing. (pics 12-13) Measure out .5 inches from the center line, and inline with the .5 of the neck line. Then draw a line from that corner point down to the 6 inch mark. You now have your neck opening. This will give you a slight V neck opening. Sew along the .5 seam line and down the V. Snip the seam, cut the V and turn the facing inside out. Finish in any manner you choose. Be aware that the V will have a tendency to tear if you are not careful.
If you have questions, email me at rozewolf@gmail.com